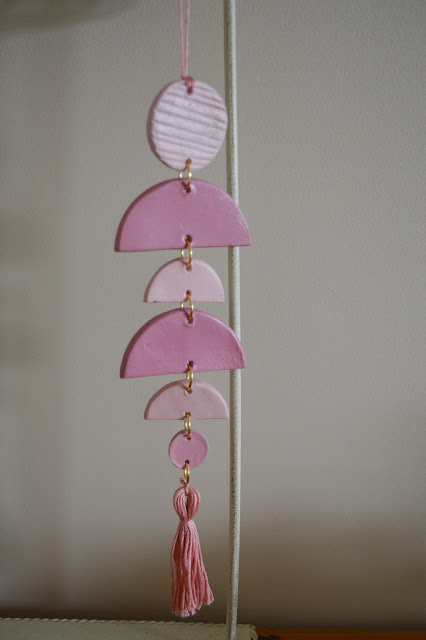
Clay Wall Hanging DIY // Tutorial
Hello darlings!
I am finally back to share the promised DIY tutorial some of you may have seen me mention on my Instagram.
I am in the process of trying to give my room a fresh look without actually spending a lot of money(that I don't have right now anyway!). I'm going for a feminine boho vibe so I thought these little wall hangings might do that for me.
My inspiration for this DIY was from trusty Pinterest of course! I am really happy with how mine turned out and I am excited to share how I made them with you.
What you will need:
~ air dry clay
~ a knife
~ a needle tool to poke holes with
~ circular objects to punch out the shapes
~ acrylic paint in the colour of your choice
~ jump rings (I used gold 10mm ones)
~ a tray & baking paper to work on
~ a rolling pin
Step One
Roll out some air dry clay on the baking paper (to avoid imprinting the clay if you are woking on a textured surface) to about 3-4mm thick and punch out circles in a range of sizes.
I used a range of different circular objects from a jar to a small board games pawn to get the circles I wanted.
If you want half circles simply divide one circle in half evenly. This step all depends on your personal preference!
Step Two
Poke smallish holes in the top and bottom of each of your shapes. Make sure that they are close enough to the edge of the shape that you'll be able to get the jump ring around them easily, if that makes sense.
Step Three
Once the pieces are completely dry, it's time to paint! It took a long time for me to mix the colours I had in mind. I still didn't get exactly what I wanted but I am still happy with the results.
Be sure to get the paint inside the holes too.
Step Four
This is the fun part! Figure out how you want to arrange your pieces and then using the jumprings and some pliers link them all together.
I used gold because I prefer gold over silver but you do what you like the look of.
Step Five (optional but recommended)
I chose to add some mini tassels to complete my hangings and I really like how they turned out.
And voila, you are done!
 |
| This is the first one I made. |
 |
| My second one. |
Until next time...
keep blooming,


